Preparing Your Cabinets

Before you start painting your cabinets, you need to make sure they are clean and ready for a fresh coat of paint. This involves emptying the cabinets, removing any old hardware, and thoroughly cleaning the surfaces.
Removing Items from Cabinets
Emptying your cabinets is the first step in preparing them for painting. It’s important to remove everything from the cabinets, including dishes, utensils, food items, and any other belongings.
- Start by taking inventory of what’s inside. This will help you decide where to put everything while you work.
- Organize your items into categories, such as dishes, cookware, utensils, and food items. This will make it easier to pack and unpack your belongings later.
- Use boxes or bins to store your belongings, and label them clearly. This will help you keep track of your items and make it easier to put everything back in its place after painting.
Cleaning Cabinet Surfaces
Once your cabinets are empty, you need to clean them thoroughly. This will remove any dirt, grease, or grime that could prevent the paint from adhering properly.
- Use a cleaning solution specifically designed for cabinets. These solutions are formulated to remove tough stains and residue without damaging the cabinet surfaces.
- Apply the cleaning solution to a soft cloth or sponge and wipe down the entire surface of the cabinets, including the doors, drawers, and sides. Pay attention to any corners or crevices where dirt might accumulate.
- Rinse the cabinets with clean water and dry them thoroughly with a soft cloth.
Removing Old Hardware
Before you start painting, you’ll need to remove any old hardware, such as hinges and knobs. This will prevent the paint from getting on the hardware and make it easier to paint around the edges.
- Use a screwdriver to remove the screws holding the hardware in place. Be careful not to damage the surrounding wood.
- Store the hardware in a safe place, such as a plastic bag or container, to prevent it from getting lost or damaged.
- If you plan to reuse the hardware, clean it thoroughly with a mild soap and water solution.
Cleaning the Cabinets
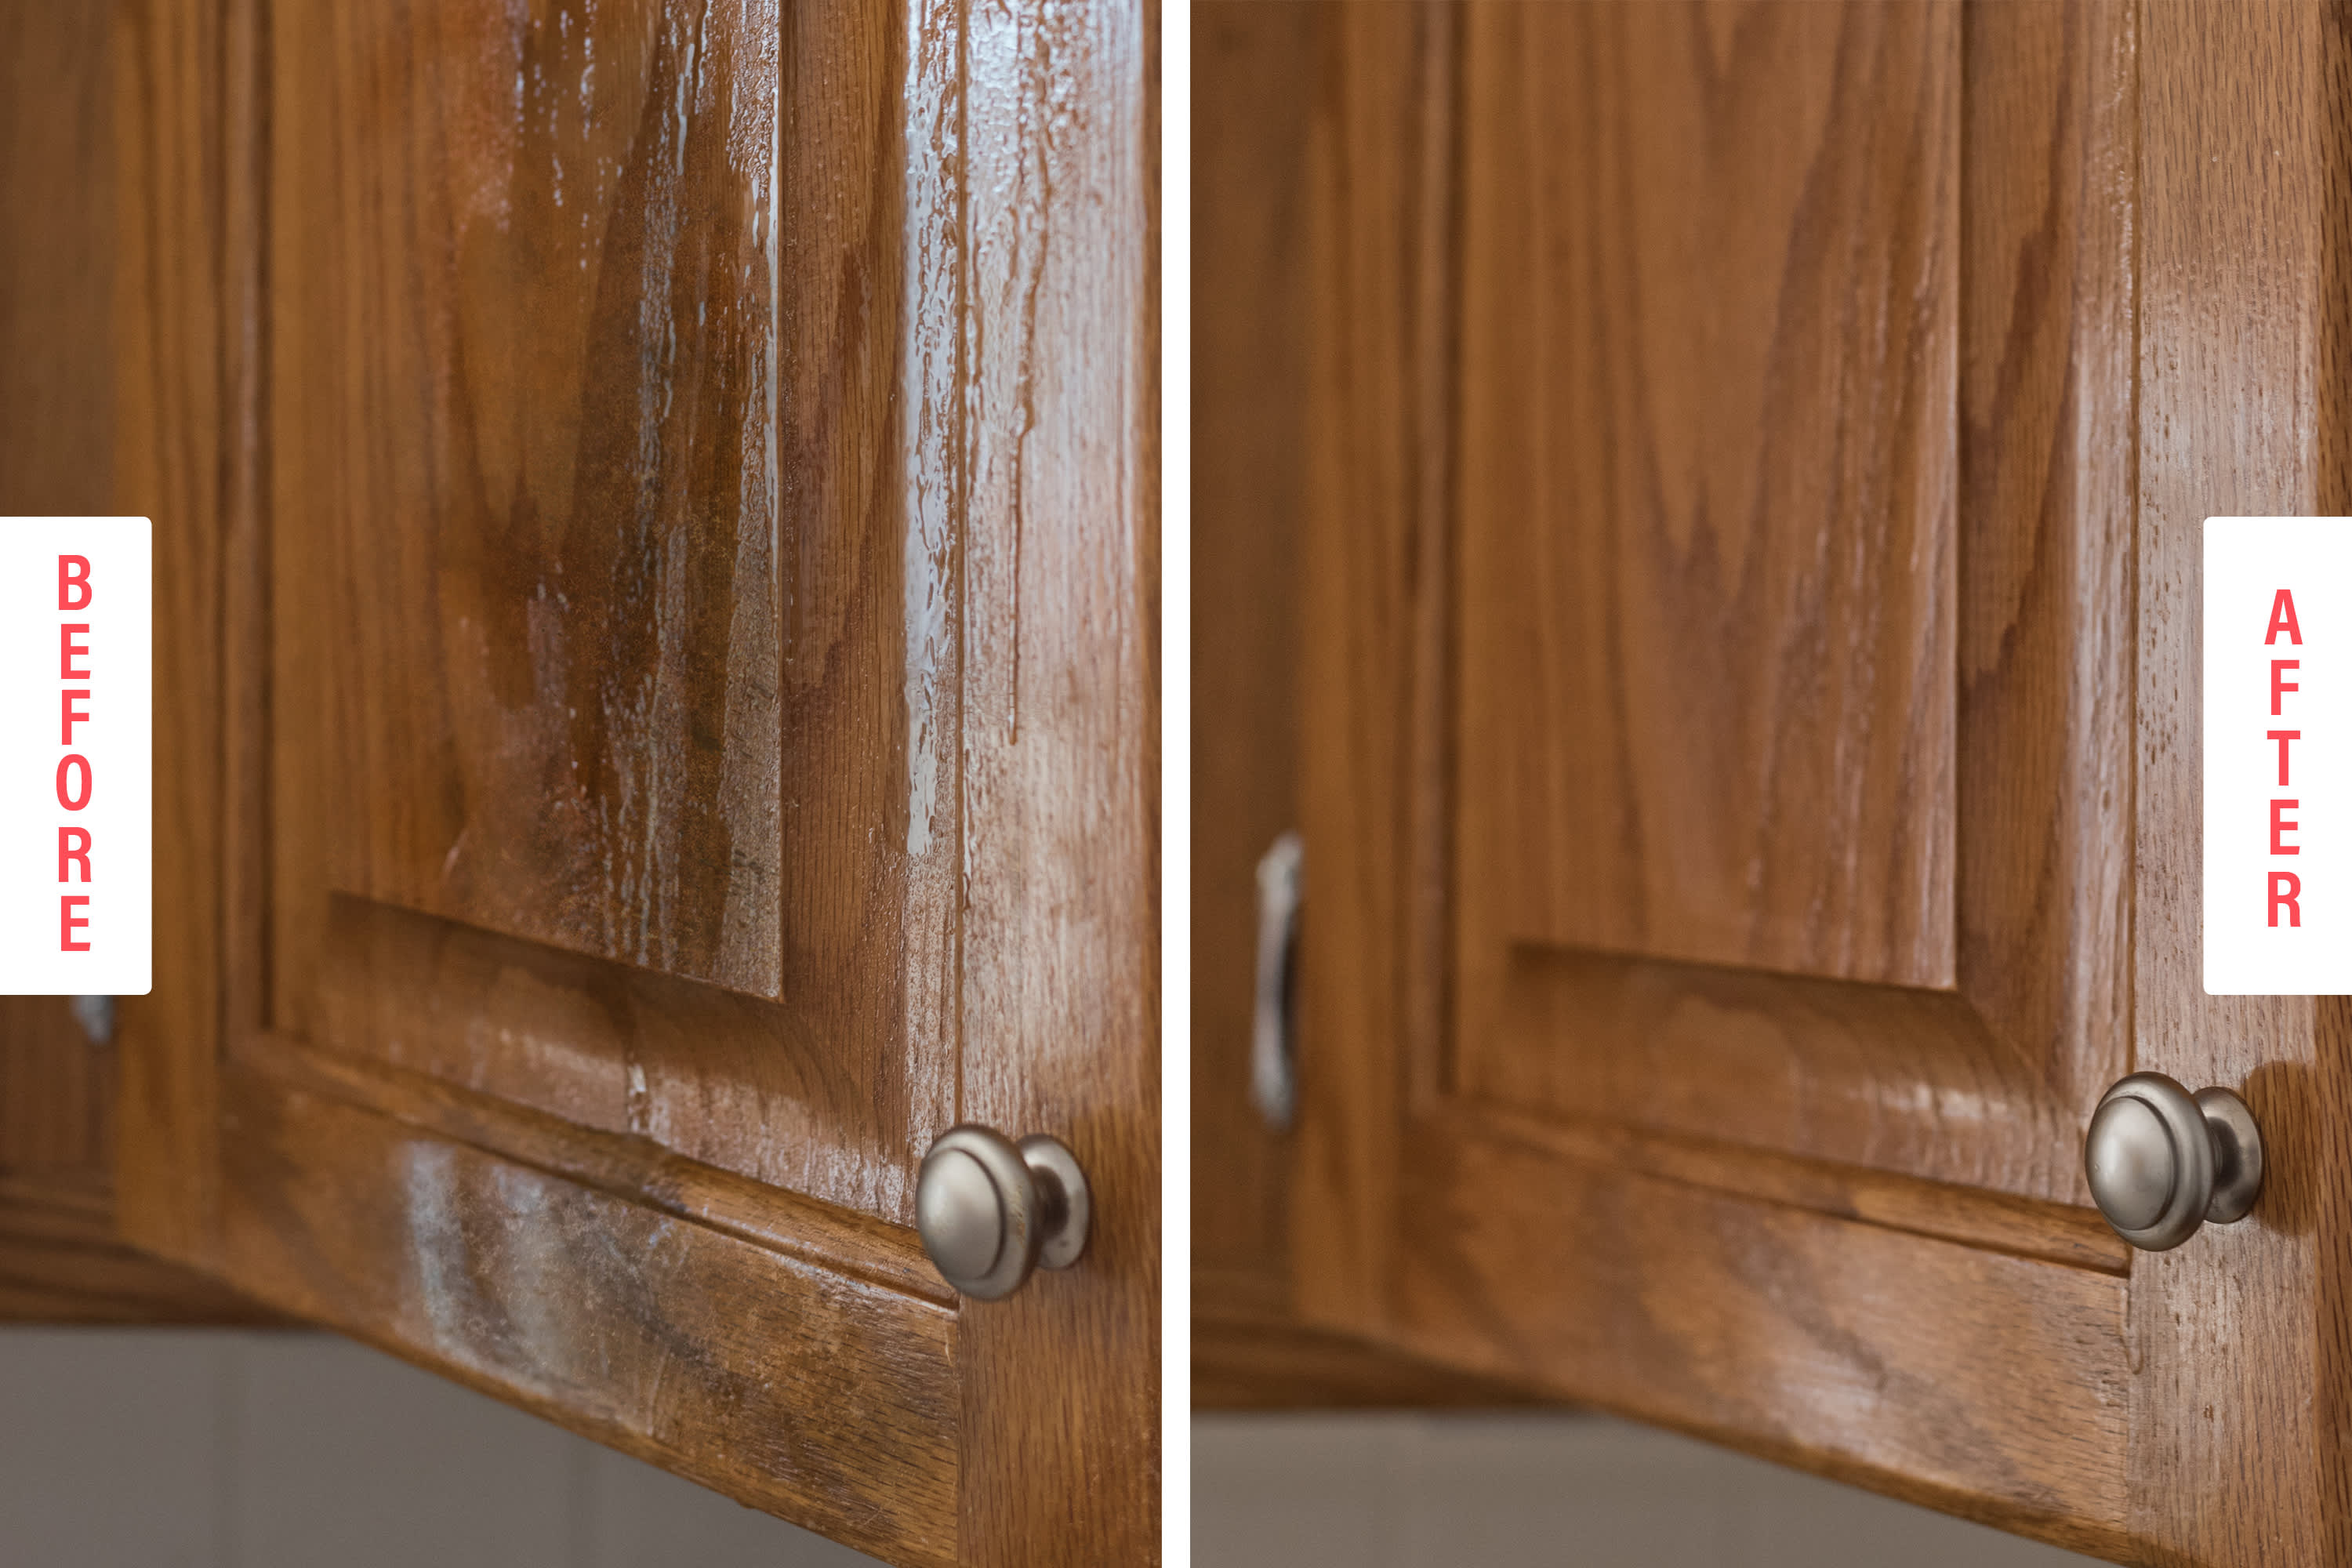
:max_bytes(150000):strip_icc()/use-deglosser-cabinets-before-painting-9361c4a0-4c37f6eacdc34086856df18654a2eb2d.jpg "Cabinets kitchen clean painting before way")
Thorough cleaning is essential before painting your cabinets. This ensures a smooth, even paint application and a long-lasting finish. Grease, grime, and sticky residue can hinder the adhesion of the paint, leading to peeling or chipping.
Cleaning Methods, How to clean cabinets before painting them
Several cleaning methods can effectively remove grease, grime, and sticky residue from your cabinets.
- Degreaser: Degreasers are specifically designed to remove grease and oil. Apply a degreaser to a cleaning cloth and wipe down the cabinets. Rinse the surfaces thoroughly with water and dry them completely.
- Dish soap: Dish soap is a gentle yet effective cleaning agent. Mix a few drops of dish soap with warm water and apply it to a cleaning cloth. Wipe down the cabinets and rinse thoroughly with water. Dry them completely.
- Baking soda paste: Baking soda is a natural abrasive that can help remove stubborn stains. Mix baking soda with a little water to form a paste. Apply the paste to the stained areas and scrub gently with a cleaning cloth. Rinse the surfaces thoroughly with water and dry them completely.
Cleaning Technique
When using a cleaning solution, it is essential to use a soft cloth to avoid scratching the cabinet surfaces.
- Dampen the cloth with the cleaning solution.
- Wipe down the cabinets in a circular motion, paying close attention to corners and crevices.
- Rinse the cloth frequently to remove dirt and debris.
- Dry the cabinets thoroughly with a clean, dry cloth.
Cleaning Interior and Exterior Surfaces
Cleaning both the interior and exterior surfaces of the cabinets ensures a thorough clean.
- Interior: Wipe down the interior shelves and walls with a damp cloth. Remove any loose items or debris before cleaning.
- Exterior: Clean the exterior surfaces of the cabinets, including the doors, drawers, and frames. Pay attention to the handles and knobs, as they can accumulate dirt and grime.
Cleaning Hard-to-Reach Areas
Cleaning hard-to-reach areas like corners and crevices requires special attention.
- Use a toothbrush or a small brush to reach into tight spaces.
- Cotton swabs can also be used to clean small crevices.
Cleaning Checklist
A checklist ensures that all surfaces are thoroughly cleaned before painting.
- Interior shelves and walls
- Exterior doors, drawers, and frames
- Handles and knobs
- Corners and crevices
- Bottom of cabinets
Final Touches: How To Clean Cabinets Before Painting Them
Once you’ve thoroughly cleaned your cabinets, the final touches are crucial to ensure a smooth and successful paint job. These steps may seem minor, but they play a significant role in achieving a professional-looking finish.
Drying Time
Drying the cabinets completely before painting is essential to prevent paint from peeling or bubbling. If moisture remains trapped beneath the paint, it can create an uneven surface and lead to long-term issues. Allow the cabinets to air dry completely, ideally for at least 24 hours. If you’re in a humid environment, you may need to extend this drying time.
Sanding for a Smooth Finish
Sanding the cabinets after cleaning creates a smooth surface for the paint to adhere to. This step is especially important if your cabinets have a glossy finish, as it helps the paint to bond better. Use fine-grit sandpaper, such as 180-grit, and sand gently in the direction of the wood grain. Avoid sanding too aggressively, as this can damage the cabinet surface.
Patching Imperfections
Before painting, it’s a good idea to patch any cracks or imperfections in the cabinet surfaces. Use a wood filler that matches the color of your cabinets and apply it with a putty knife. Allow the filler to dry completely before sanding it smooth with fine-grit sandpaper.
The Benefits of Primer
Using a primer before applying paint provides several benefits:
- It creates a uniform surface for the paint to adhere to, resulting in a smoother, more even finish.
- It helps to seal the wood, preventing the paint from absorbing into the surface and creating a blotchy appearance.
- It can help to hide imperfections in the wood, such as knots or grain patterns.
Safety Precautions
When cleaning and preparing cabinets for painting, it’s essential to prioritize safety:
- Wear protective gloves and eyewear to prevent skin and eye irritation from cleaning products.
- Ensure adequate ventilation when working with chemicals and paints.
- Keep flammable materials away from heat sources.
- Store cleaning products and paints in a safe and secure location, out of reach of children and pets.
How to clean cabinets before painting them – Before you start painting your cabinets, it’s important to give them a good clean. Use a degreaser to remove any grease or grime, and then scrub with a damp cloth. After you’ve finished cleaning, you might want to think about adding a ceiling fan to your bedroom to keep things cool and comfortable.
You can find some great options for bedroom ceiling fans uk , and once you’ve got that sorted, you’ll be ready to start painting your cabinets!
Cleaning cabinets before painting them is important for a smooth finish. You want to make sure all the dust and grime is gone, and you can even use a little bit of soap and water to get things really clean.
If you’re worried about security, though, you might want to think about upgrading your bedroom door locks to something like bedroom door locks that cannot be picked for extra peace of mind. Once your cabinets are clean, you can start prepping them for paint with a good sanding and a primer.
It’s all about the details, so take your time and enjoy the process!

